As for the Windows Photos app, the same goes. Certain things might not be saved where you expect them to, and we are going to talk about that a bit.
How to find photos & videos taken with Camera app in Windows
Locating where the Windows Camera app saves photos and videos is no hard task.
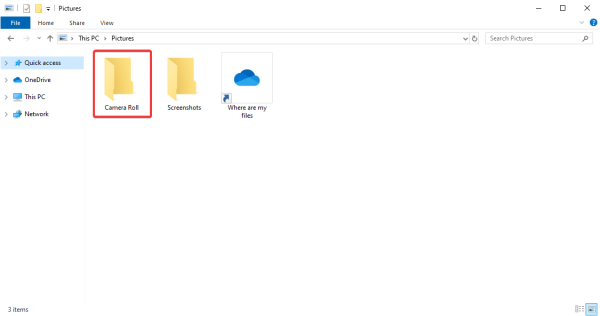
The app automatically creates a folder called Camera Roll, and that is where all photos and videos were taken are stored. To get there, launch File Explorer by clicking on the folder icon on your taskbar, then scroll to Pictures, and from there, open Camera Roll to view all your images.
2] Unlink the Pictures folder in OneDrive
If you are using the pre-installed OneDrive tool to synchronize your content to the cloud, then we might have a few problems because we have come to realize that the Camera Roll folder is not always found in Pictures, which is the official OneDrive pictures folder, and not that of Windows 10.
Bear in mind that if you activate OneDrive, things will likely not work the same where the folders are concerned. Therefore, we suggest following these steps. Should you prefer this to stay normal, then the best course of action is to unlink the Pictures folder. To get this done, launch OneDrive, then select the Account tab. From there, click on Choose folders, search for the Pictures folder, and unlink it. Right away, the regular Pictures folder should appear with the Camera Roll section inside.
3] Change Camera app save location
If you want to continue using the OneDrive Pictures folder as your default, then we suggest changing where the Windows Camera app saves your photos and videos. There are a few ways you can do this, so let’s discuss it. The easiest way is to launch the Camera app, then click on the Settings gear icon at the top-left section. Scroll down, and select the option that says, Change where photos and videos or saved. A new window should open right away, so when it does, scroll to the Photos and Videos section, and select where you want to save new content.
Alternatively, you could click on the Windows key + I to fire up the Windows 10 Settings app, then go to System > Storage > Change where new content is saved. In Windows11, you see these settings here – Settings > System > Storage > Advanced storage settings > Where new content is saved.
Where does the Windows Photos app store content
By default, the Windows Photos app store images and videos in the Photos folder. The option is there, however, to save content to wherever you want if the Photos folder is not fitting, especially when you are editing a video. Furthermore, the Photos app is not just about editing content, but a place for users to view all their favorite images and videos. It comes with a feature that allows it to show all the images stored on your computer, but first, those folders must be linked. To a link, a new folder to the Windows Photos app, launch the program, then fire up the Settings area by clicking on the icon with the three dots, and after that, click Settings. From there, select Add Folders under Sources, and just wait for the software to add all images and videos from the newly added folder. That should do the trick just fine. Also, bear in mind that users can show content from their OneDrive picture folder. Go to Settings again, and scroll to the section that says Microsoft OneDrive and do your thing.
