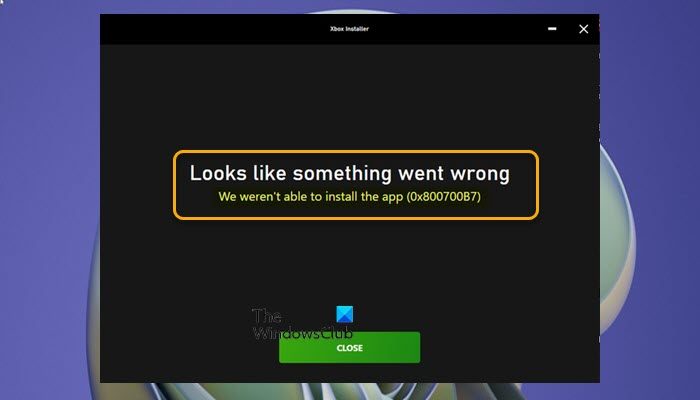
When you encounter this issue, you’ll receive the following full error message;
What does error code 0x800700b7 mean?
In Windows 11/10, error codes can be the same but occur in different scenarios. The error code 0x800700B7 can also occur during Windows Upgrade, when downloading Windows Subsystem for Android, during System Restore, and when WslRegisterDistribution fails on your system. Looks like something went wrong We weren’t able to install the app (0x800700B7)
We weren’t able to install the app (0x800700B7) Xbox app error
If you’re faced with this issue, you can try our recommended solutions below in no particular order and see if that helps to fix the error We weren’t able to install the app (0x800700B7) that occurred on your Windows 11/10 PC. Let’s take a look at the description of the process involved concerning each of the listed solutions.
1] Run Windows Store Apps Troubleshooter
If you’re having issues installing Microsoft Store apps on your Windows 11/10 PC, it’s a recommended best practise to run the Windows Store Apps Troubleshooter and see if that helps to fix the error; in this case the We weren’t able to install the app (0x800700B7) error that occurred on your system. To run Windows Store Apps Troubleshooter on your Windows 11 device, do the following:
Press Windows key + I to open Settings app.Navigate to System > Troubleshoot > Other troubleshooters.Under the Other section, find Windows Store Apps.Click Run button.Follow on-screen instructions and apply any recommended fixes.
To run the Windows Store Apps Troubleshooter on your Windows 10 PC, do the following:
Press Windows key + I to open Settings app.Go to Update and Security.Click the Troubleshooter tab.Scroll down and click on Windows Store Apps.Click the Run the troubleshooter button.Follow on-screen instructions and apply any recommended fixes.
2] Run SFC and DISM scan
The SFC/DISM utility are both native tools to the Windows 11/10 OS which PC users can utilize to fix corrupt or missing system/image files on their system. This solution requires you to run SFC scan and DISM scan and see if that helps to fix the error in hand.
3] Reset Microsoft Store
This solution requires you to reset Microsoft Store via Settings app or using the wsreset.exe command. Keep in mind that performing this task, all the cache files in Windows Store will be cleared. It will permanently delete the app’s data on your device including your sign-in details. To reset Microsoft Store via Settings app on your Windows 11 device, do the following:
Open Settings app.Click on Apps > Apps & Features.Scroll down to Microsoft Store on the list.Click on the ellipsis (three dots} button.Select Advanced Options.Scroll down and click Reset.Exit Settings app when done.
To reset Microsoft Store via Settings app on your Windows 10 device, do the following:
Open Settings.Click Apps > Apps and features.Search for or scroll to find Microsoft Store.Next, click on the entry once to expand its options.Now, click the Advanced options link.In the page that opens, scroll down and click the Reset button.Exit Settings app when done.
4] Clean Boot system and install app
This solution requires you to Clean Boot your system – this action can remove any conflicts that may occur during the app installation – this means starting your Windows 11/10 computer with minimum required drivers and programs. In that system state, you can try installing the app and see if it completes successfully without errors. Otherwise try the next solution.
5] Clear Cache
Cached data might become corrupted, which can lead to issues. This solution requires you to clear cache, and as well clear Temp folder on your PC and see if that helps fix the error in view. If not, try the next solution.
6] Install app to another drive/partition
This solution requires you to install/save the app to another drive or alternatively, try creating a new partition on the drive and see if installing to the partition will be successful. To change where content is downloaded or saved to your Windows 11 PC, do the following:
Press Windows key + I to open Settings app.Click System > Storage.Scroll down and click Advanced storage settings to expand the section.Now, click Where new content is saved option.In the next screen, click the New apps will save to dropdown.Now, select the internal drive or external drive per requirement.Exit Settings app when done.
To change where content is downloaded or saved to your Windows 10 PC, do the following:
Press Windows key + I to open Settings app.Click System > Storage.Under More Storage Settings, click on Change where new content is saved.Click on the New apps will save to dropdown.Select the drive where you want your newly downloaded content to be saved.Exit Settings app when done.
Try the next solution if this wasn’t helpful.
7] Reset/Reinstall Gaming Services
Damaged or corrupted cache or temp files generated by the Gaming Services or the App Installer apps can trigger the error in view. In this case, you can reset or reinstall Gaming Services to resolve the issue. To perform this task, follow the instructions in the guide on how to fix 0x00000001 Game Pass error on Xbox. Hope this helps! Related post: Fix Minecraft Installation Error 0x80070424, 0x80131509, 0x80070057, etc.
How do I fix error 0x800700b7?
The error 0x8007007B may occur when you try to install a game in the Xbox app for Windows 11/10 PC. This means that the drive on which you originally installed the game couldn’t be located, or that you don’t have enough storage space on your Windows device to install the game. To fix this error, choose a new storage device on which to install the game, or free up space on your hard drive.

